Using ffmpeg’s vpp_qsv detail enhancement filter
As part of my last post, I was exploring video transcoding with an Intel Arc GPU and how different levels of ICQ affect video size and quality. During which, I noticed there’s a QSV compatible filter in ffmpeg called vpp_qsv which has a detail parameter. VPP stands for Video Post Processing and the filter help text simply says “enhancement level” for detail. The potential to do some automatic picture enhancements directly on the GPU piqued my interest so I decided to have a play with it.
Firstly, I grabbed a sample 4k video of a chameleon from pexels because its reasonably close framing of its body and has a fair amount of detail on its scales. Next, I used the same ffmpeg command from my previous post, but with a global_quality (ICQ) value of 30. The idea here is to deliberately degrade the footage so I can see what the detail parameter actually does in terms of trying to enhance the quality. I then generated a series of new videos with a detail level ranging from 0 to 100 in increments of 10 and then calculated VMAF scores for all of them. VMAF is an objective full-reference video quality metric that predicts subjective video quality based on a reference and “distorted” video sequence. The metric can be used to evaluate the quality of different video codecs, encoders, encoding settings etc.
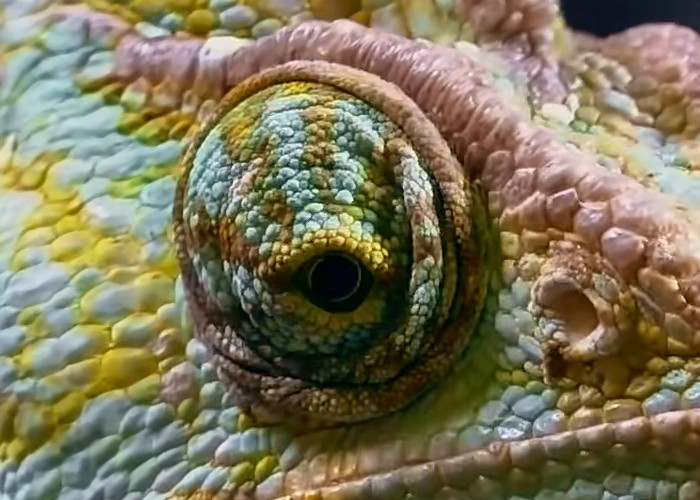
This shows that the detail parameter is doing something but we start to get diminishing returns from a value of about 70 onwards, for much larger increases in file size. I was curious what this had actually done to the resulting video though. Below is a zoomed crop on the eye of the chameleon – Its pretty hard to spot, but the image from ICQ 30 detail 0 is slightly softer compared to the original (which is expected) and the image from ICQ 30 detail 70 is visibly sharper. Whether this means a better experience is up to you, keeping in mind that this is a single frame from a video.
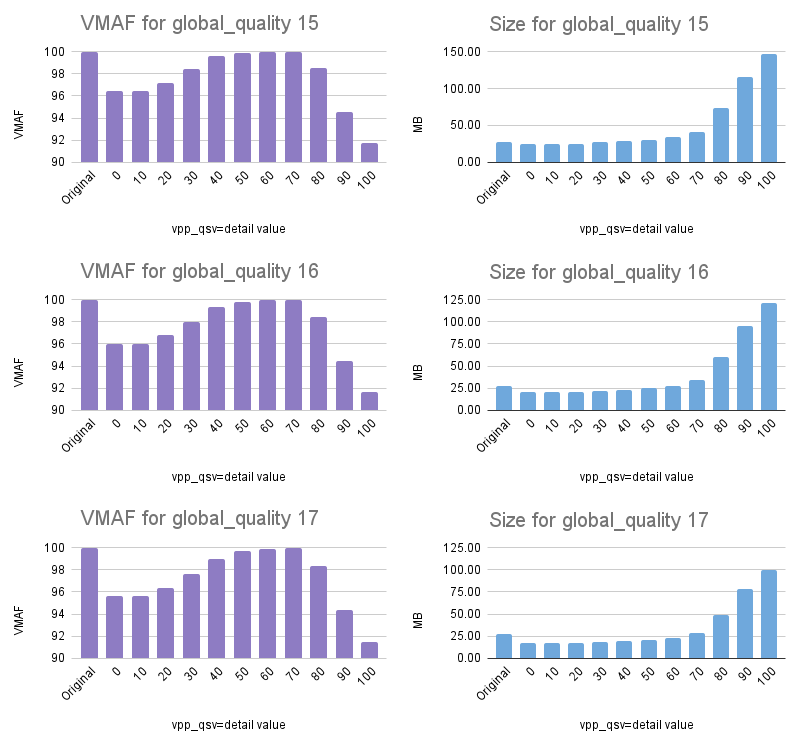
Given I’m unlikely to use an ICQ of 30 myself, I was curious how the detail parameter affects the VMAF score for different ICQ levels. Based on my last article I decided that ICQ values of 15, 16 or 17 would be the likely values I’d use, so I figured lets see how these values look for this sample video.
The source video itself is a small 4k video, coming in at only 28MB so I’ve included the figures for the original video in these new graphs as the file size becomes a lot more important.
We can see a similar trend as with the VMAF scores for ICQ 30, but with a larger fall off past a detail value of 70. Given these files should in theory be higher quality to start due to their lower ICQ value, we can see the impact of a higher detail value isn’t as large past 40 or 50. More importantly here, the generated file size seems to be larger than the original from about detail 70 onwards, which means we get no benefit at all other than perhaps a slightly sharper image and wasting extra disk space.
As interesting as these results are, this 28MB sample file is not representative of my use case, so lets re-run the numbers using the same 1080p input file for my previous post with an ICQ of 16, as this is most likely what I’ll be using going forward.
This again shows a similar trend, but with less of an impact at the higher detail levels. The file size however, ends up close to or larger than the original beginning at detail 70 and above which isn’t what I’m personally looking for as I’m trying to find a good balance of quality and file size.
It’s still unclear to me what exactly this parameter does besides adding some sharpening. Based on these results however, if I want to use this in my transcodes it seems like a value somewhere between 30 and 40 should (According to the VMAF scores) enhance my video over a plain transcode, whilst still ultimately reducing the file size. Once again though, remember that quality is subjective and your milage may vary depending on your hardware, source video and settings.


